The Best Sourdough Biscuits: A Family Tradition

I’m finally sharing my go-to sourdough biscuits recipe—and trust me, it’s worth the wait. This is one of those recipes that I believe can be passed down from generation to generation. It’s buttery, flaky, and freezer-friendly—everything I need in a busy homemaking season.
It’s very rare that you come into my house and I do not have these sourdough biscuits in my freezer just waiting to be baked. And my kids know it! They go back and forth between this recipe and my homemade waffle recipe—both of which I keep on hand in the freezer for whatever they choose.
These sourdough biscuits are flaky, buttery, and incredibly simple to make. And best of all? You can freeze them for busy mornings or company! Whether you’re new to sourdough or a seasoned baker, this recipe is one you’ll return to again and again.
Why You’ll Love This Sourdough Biscuit Recipe
- Made with simple pantry ingredients
- Perfect use for sourdough discard
- Freezer-friendly for busy mornings
- Quick to make—no rise time required
- Great with savory or sweet toppings

🕓 Prep & Cook Time
- Prep Time: 10 minutes
- Cook Time: 20–23 minutes
- Total Time: 30–35 minutes
- Yield: 6–7 biscuits
🧂Ingredients
- 1 cup unbleached all-purpose flour
- 2 teaspoons baking powder
- 3/4 teaspoon salt
- 8 tablespoons unsalted butter (1 stick), cold
- 1 cup sourdough discard
Optional: You may substitute up to 1/2 cup of the flour with fresh-milled soft white wheat flour. If using freshly milled whole wheat flour (such as hard red wheat), be aware the dough will be stickier, the rise less pronounced, and the flavor heartier. These differences are natural—just don’t overwork the dough, and be generous with flour on your surface.
I use my NutriMill grain mill to grind fresh flour from wheat berries, and it’s one of my favorite ways to boost nutrition in baked goods. If you’re looking to invest in one, you can use my code MAKINMACON20 at NutriMill.com/MAKINMACON20 to get $20 off your purchase. I’ve loved mine and use it frequently!
👩🍳 Instructions
- Preheat oven to 425°F if baking right away or from the freezer.
- Line a baking sheet with parchment paper, or use a cast iron skillet. (We love Lodge Cast Iron)
- Combine the dry ingredients (flour, baking powder, and salt).
- Cut the butter into the flour until the mixture is unevenly crumbly.
- Add the sourdough discard, mixing gently until the dough is cohesive.
- Turn the dough onto a lightly floured surface and gently pat it into a 6-inch round about 1 inch thick.
- Cut out the biscuits.
- Place them at least 2 inches apart on the prepared baking sheet or in a skillet.
- Bake for 20–23 minutes, or until golden brown.
If freezing: Place unbaked biscuits on a lined pan and freeze until solid. Transfer to a freezer bag and bake from frozen when needed.
What is sourdough discard?
Sourdough discard is the portion of starter you remove before feeding to keep your culture healthy. While it’s not as bubbly or active as freshly fed starter, it still has great flavor—and yes, it can still rise dough. You just won’t get quite the same lift as a fully active starter.
I’ve used discard to make biscuits (like these), muffins, waffles, and even bread. It’s a great way to reduce waste and stretch your baking a little further.
Want to start your own starter? Here’s my Beginner’s Guide to Sourdough to help you get going.
Must-Know Tips for Flaky Sourdough Biscuits
Updated after receiving helpful reader comments — hopefully this clears up a few common questions!
- Cold ingredients matter — Cold butter and cold sourdough discard make a big difference in keeping the dough cool and workable.
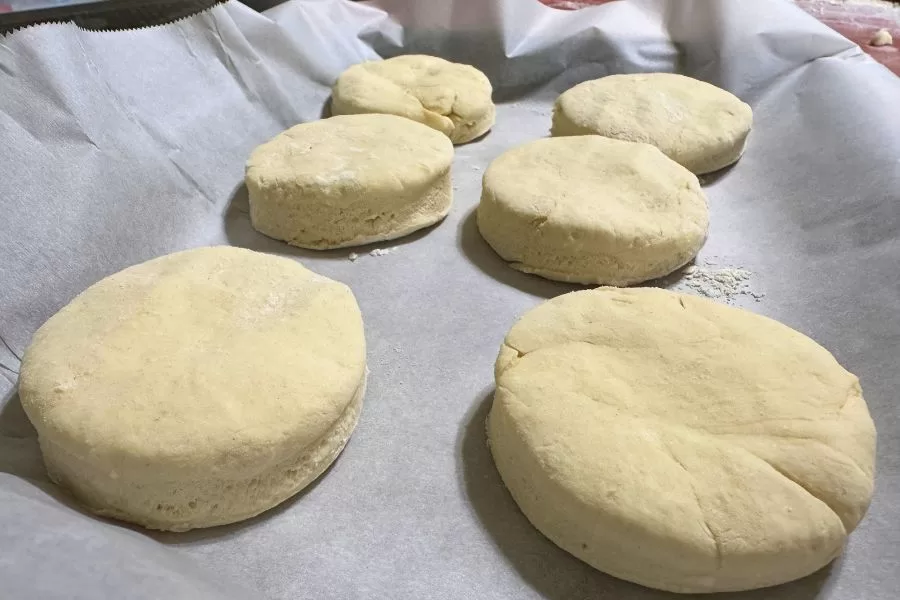
- Biscuit thickness — Roll dough about 1 inch thick. This recipe makes 6 large biscuits, possibly 7.
- Sticky dough fix — If the dough feels sticky, sprinkle in a little flour until it comes together. This can happen if your starter is freshly fed or on the runny side.
- Fresh vs. frozen baking — Fresh biscuits tend to be fluffier. Frozen work too, but may rise slightly less.
- Top with butter — A small pat of butter on top before baking helps with browning and flavor.
- Oven tips — Standard bake is 425°F for 20–23 minutes. In cast iron, consider lowering to 400°F and baking slightly longer to ensure the center is done without over-browning the bottom.
- Biscuit shape — However you cut them is fine—don’t stress perfection.
My Favorite Biscuit Hack
This recipe is super simple – but it’s even better if you have a food processor. I have a Ninja Food Processor and I don’t know if I could live without it. I found it on sale and it is one of my all-time favorite gadgets.
I simply pulse in the dry ingredients, add the butter and press chop, and finally add the sourdough discard and press dough. Voila! My dough is ready to plop onto a floured surface, begin rolling out, and cutting into biscuits. It has saved me from some future carpal tunnel, I am certain of it.
How to Freeze and Reheat
To freeze: Place cut biscuits on a parchment-lined tray and freeze until solid. Transfer to a freezer-safe bag for long-term storage.
To bake from frozen: Place the frozen biscuits on a baking sheet or in a cast iron skillet and bake at 425°F. Just note—freezing does affect the rise slightly. They may not puff quite as high as fresh dough, but they’ll still be tender and delicious. Bake time may vary, so watch closely and pull them when they’re golden brown on top.
For a quick weekday option, you can also bake a few in the toaster oven at 350°F until heated through and lightly browned.
What to Serve with These Biscuits
- Momma’s Chocolate Gravy
- Homemade sausage gravy
- Honey butter or freezer jam
- Scrambled eggs and bacon
- A hot cup of coffee or your favorite herbal tea
FAQ About Sourdough Biscuits
Can I use active starter instead of discard?
Yes, but the rise may be slightly more pronounced. Discard gives great flavor without extra rise.
Do I need to chill the dough before baking?
Nope! These bake beautifully right after cutting—or you can freeze them for later.
Can I double this recipe?
Absolutely. I often do when prepping for guests or stocking the freezer.
🔗 More Sourdough Recipes You’ll Love
- Sourdough Chocolate Chip Cookies
- Sourdough Banana Muffins
- Sourdough Dutch Baby
- Sourdough Muffins with Blueberries & Strawberries
- Sourdough Discard Beyond Bread: Creative and Healthy Ways to Use It

💬 Let’s Chat!
Let me know in the comments below if you give this recipe a try—I love hearing from you! And remember, I’m sharing it here so you don’t have to keep it a secret. Share it to your heart’s content!
💌 Stay Connected
🌾 Want more recipes like this? Join Rooted Table, our once-a-month kitchen email. You’ll get my latest recipe, freezer tips, and a sprinkle of encouragement—straight from my table to yours.
Ready to bake? Here’s the full recipe!

Sourdough Biscuits
Equipment
- 1 Baking Sheet
- Measuring spoons/cup
Ingredients
- 1 cup unbleached all-purpose flour
- 2 teaspoons baking powder
- ¾ teaspoons salt
- 8 tablespoons unsalted butter 1 stick
- 1 cup sourdough discard
Instructions
- Preheat oven to 425°F if baking right away or from the freezer.
- Line a baking sheet with parchment paper, or you can place them in an iron skillet.
- Combine the dry ingredients (flour, baking powder, and salt).
- Cut the butter into the flour until the mixture is unevenly crumbly.
- Add the sourdough discard, mixing gently until the dough is cohesive.
- Turn the dough onto a lightly floured surface and gently pat it into a 6” round about 1” thick.
- Cut out the biscuits.
- Place biscuits on the prepared baking sheet at least 2” apart and either place them in the freezer for later use or into the oven.
- If baking, bake for 20-23 minutes or until golden brown.
Notes
- Best to use cold sourdough discard and cold butter for flakier biscuits. Cold starter keeps the dough cooler and easier to work with.
- Roll dough about 1 inch thick; you should get 6 large biscuits (possibly 7).
- For extra flavor and browning, add a small pat of butter to the top of each biscuit before baking.
- If dough is sticky, add a bit more flour until it’s workable. This can happen if your starter is runny or freshly fed.
- Baking fresh vs. frozen: Freshly baked biscuits tend to be fluffier. Frozen ones still work well but may rise slightly less.
- Baking temperature tips: Standard oven temp is 425°F for 20–23 minutes. In cast iron, consider lowering to 400°F and baking slightly longer to ensure the inside is fully cooked without over-browning the bottom. Check at the 20-minute mark.
- Oven times and results may vary—watch closely and adjust as needed.
- Biscuit shape and size are up to you—these tips are simply what works in my kitchen.





When you say freezer friendly, does that mean that you can freeze the biscuits before or after baking them off?
I freeze my biscuits before baking them. It’s a wonderful way to have them ready in advance. I love to gift them this way as well. 😁
Does it matter if your discard is cold or not? Does it have to be room temperature?
Cold is best. The dough seems to do so much better. 😊 However, I have successfully done it both ways.