Homemaking Harmony: A Beginner’s Guide to Sourdough

Welcome to the second post in our Homemaking Harmony series! This week, we’re taking a moment to share something that has become dear to me: sourdough! You might wonder how this fits into a Homemaking Harmony series, but I assure you, sourdough has brought harmony to our home, and I’ve been able to bless others with my goodies as well. So, without further ado, here is the long-awaited sourdough instructional you have all been asking for.
I know it has taken me some time to get it all together, and I really was unsure if I was the person to even be putting it out here. I have often referred others to different websites to begin their journey, but in the end, they still called me wanting advice.
I am no expert. I began my sourdough journey with a purpose. I wanted to feed my family better food. For several years, I have been on keto and stayed away from bread; however, that didn’t mean my children couldn’t have any. I read that sourdough is great for the gut and easy for the body to absorb. If you have blood sugar issues, then sourdough may be a better option.
What is sourdough starter?
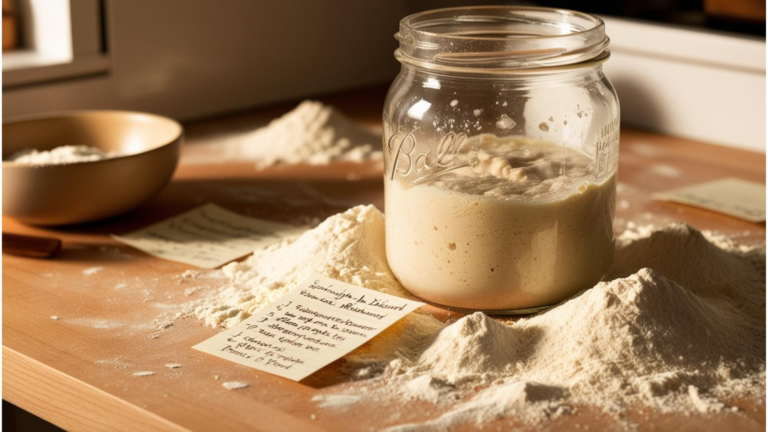
A sourdough starter is a mixture of flour and water that captures wild yeast and bacteria from the environment. This mixture ferments over time, creating a bubbly and tangy base that can be used to make bread and other baked goods. The natural yeast and bacteria help to leaven the bread, giving it a unique flavor and texture that is different from breads made with commercial yeast.
What are the benefits of sourdough?
Sourdough has several health benefits. The fermentation process breaks down gluten, making it easier to digest. It also increases the availability of nutrients such as B vitamins, iron, and zinc. Sourdough bread has a lower glycemic index than regular bread, meaning it won’t spike your blood sugar levels as much. Additionally, the lactic acid bacteria in sourdough can promote a healthy gut microbiome.
Do Your Research!
Remember, I am not an expert. I am not a medical doctor. I do not proclaim to know everything. I am still in a learning process myself with making all the sourdough goodies there are. However, I love to share each and every one of them with you. So be sure to do the research for yourself. This way you can arm yourself with the knowledge you need to begin your sourdough journey with confidence.
I was so intimidated!
When I began creating my sourdough starter for the first time, I was very intimidated. However, once I got the hang of it, it was no problem at all. One of the things I stress to anyone that has asked me about starting or feeding their sourdough is that you have to remember what works for me does not always work for you. I would love to say that it is an exact measurement in giving water to your sourdough, but it has never worked that way with me. I have read several articles where the author states a 1:1 ratio or so many grams of flour to so many grams of water. I have personally never had success with that method. Maybe I am doing it wrong, regardless, what I am presenting to you today is my own personal method. I would be what some would call a “rebel” at sourdough.
Your sourdough will adapt to YOUR environment.
The recommendation is to keep your sourdough starter in a warm area to get the best rise. I agree! Yet, I have seen my starter do perfectly fine with our home being cold in the evening. However, when winter arrives, I have a harder time getting my starter to rise. The weather affects it as well. Here is the thing: you will learn your starter the more you feed it. If you pay close attention, you can tell when it is happy and when it is not. Make note of those times and adjust your feeding to that.
Why unbleached all-purpose flour?
When it comes to starting your sourdough journey, the type of flour you choose can make a big difference. I prefer unbleached all-purpose flour for several reasons. First, it’s less processed than bleached flour, meaning it retains more of the natural nutrients and flavors of the wheat. This gives your sourdough starter a better chance to develop strong, healthy yeast and bacteria. Additionally, unbleached flour has a slightly higher protein content, which helps create a more robust and active starter. While there are many flours you can experiment with, I have found unbleached all-purpose flour to be the most reliable and consistent in producing a thriving sourdough starter.
Different flours work in different ways.
I began a kamut starter when I discovered the benefits of kamut flour. Kamut, an ancient grain, is lower on the glycemic index, making it a better option for managing blood sugar levels, which is important for me with PCOS and Endometriosis. You can read more about kamut in my recipe post “Quick Pizza Dough.” My kamut starter was thriving until I swapped over to grinding my own kamut wheat berries. The starter didn’t adjust well to the change to whole wheat flour. Currently, I’m still working on my whole wheat starter, and I cover that in my video instructional that will be coming out this Friday at 3 p.m. on YouTube. I’m happy to say that it is thriving, but I am still working on the level of sourness from the starter.
If you are interested in grinding your own wheat berries, check out my YouTube video reviewing my purchase of the NutriMill Grain Mill. I think it is one of the best investments I have every made.
Purified water is best!
When I first began my starter, I did not have any spring water or filtered water on hand, so I used tap water. I didn’t seem to have any issues initially. However, I later read that the chlorine in tap water can kill the healthy bacteria in your sourdough starter. Using filtered water is beneficial because it removes chlorine and other impurities, allowing your starter to thrive more effectively and potentially rise better. That said, if tap water is all you have on hand, it will definitely work; just be aware that it may possibly affect the rise of the sourdough.
What you will need
- A large jar with a wide mouth. I personally use a half-gallon jar, but I make a lot of starter at once and do not want it to overflow.
- A tea towel
- A rubber band to hold the tea towel in place and keep random possible flies or gnats from getting in.
- A wooden spoon to stir. Yes, I use a plastic one. Don’t kill me! It just seems so much easier to clean.
- Filtered water
- Flour – Unbleached All Purpose Flour is what I personally use and am most familiar with. However, feel free to experiment with other flours!
Let’s begin the process!
Day 1:
Mix 1 cup of flour and enough water to form a somewhat thick pancake batter consistency. Stir until thoroughly combined, scraping down the sides of the jar to fully incorporate. Place the tea towel over the top of the jar and secure it with the rubber band. Set aside in a warm area and allow it to sit for 24 hours.
Day 2:
Discard half of the mixture and repeat the process of day one. Add one cup of flour and enough water to form a somewhat thick pancake batter consistency, stir, and cover. Set aside for another 24 hours.
Why throw away half the mixture?
At this point, your starter isn’t alive. If we just kept adding flour and water to the starter without discarding, we would have to add more flour and water to adjust to the amount of starter you have. In the end, you would have way too much starter and the possibility of having to wait longer than 7 days to have an active starter.
Days 3-5:
Repeat day two’s instruction for days three, four, and five.
Day 6-7:
You should be noticing a sour smell forming in your starter. Bubbles as well. For days six through seven, you will continue the discard and feeding instructions from day two; however, this time you will discard and feed every 12 hours.
By day seven, your starter should double in size and have lots of bubbles! This is proof that your starter is ready to go. A good way to know would be to do one of two things: place a permanent mark on the jar where you feed, giving you a line to know how much the starter has risen, or you could place a rubber band around the jar where you have fed.
Maintaining your starter
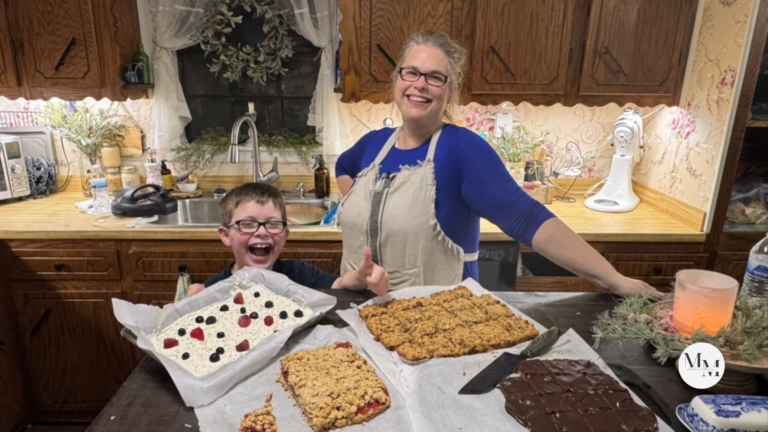
Once you have an active starter, you have a couple of ways to maintain it. You can continue the discard and feed method every 12 to 24 hours. With this method, you can use the discard in multiple discard recipes. I have some here on my blog as well. All of which are super yummy! If you try them out, be sure to leave a review!
- Sourdough Tortillas
- Sourdough Chocolate Chip Cookies
- Berry Delicious Sourdough Cobbler
- Sourdough Cinnamon Rolls
The second way you can maintain your starter is to place it in the refrigerator. With this method, you simply put a lid on your starter and place it in the fridge. I do not recommend going more than a week in your fridge. I know of people who have, but I personally have not had good luck going longer than one week. I take it out, set it on the counter to come to room temperature, stir it, feed it, and let it rise for what I need to use it for.
There is only one reason I do not let my starter come to room temperature, and that is for my sourdough biscuits. That recipe will be on the blog this weekend! You will definitely want to try this one out.
I hope that I have covered everything in this post. Feel free to comment below if you have any questions, and I will do my best to answer as soon as I can.

hi ,im just starting my sourdough starter , Im on day my 5th day. I think i made it to thick. Is there a way i can fix it ? Also what kind of bead machine or can i make it in my crock pot? thank you .
If you feel like your sourdough starter is too thick, just add a little more water—about a tablespoon at a time—until it reaches the right consistency. Sourdough is quite forgiving, so even though you’re on day five, adjusting the water amount shouldn’t cause any issues! 😊
As for baking bread in a crockpot, I haven’t tried that myself, so I don’t have a solid answer for you there. I do, however, use an Oster Bread Machine Express Bake that I got on sale, and it has been fantastic! I actually have a recipe called Sourdough Bread Machine Recipe: A Culinary Tale of Growth and a Bread-Critic Hubby on my blog if you want to check it out.
But if you don’t have a bread machine, no worries! You can still bake sourdough in a Dutch oven. Hmm, maybe I’ll have to google that crockpot method and try it out! 😉